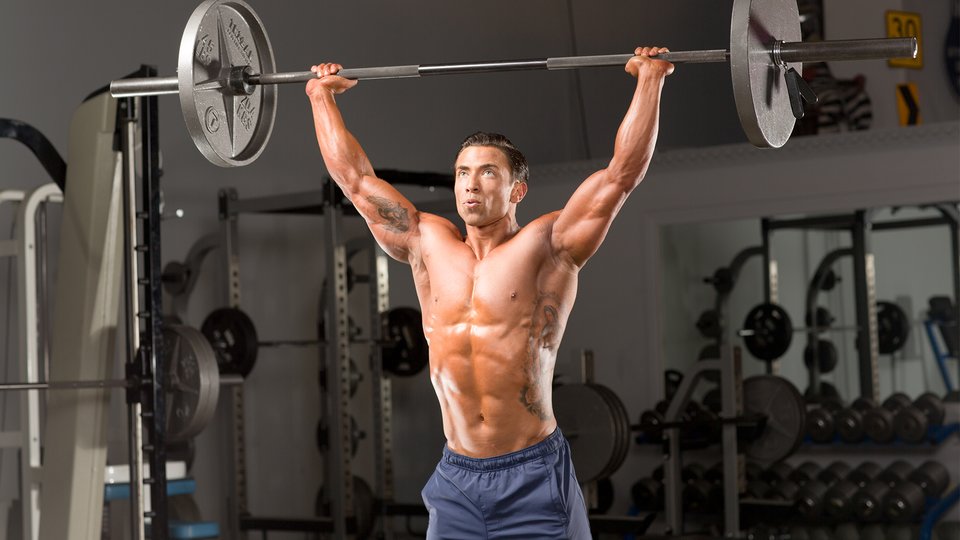
The overhead press is easily my favorite lift. I’m not sure why; it is a constant source of frustration and annoyance, but maybe that’s the reason. Nothing worth having ever came easy, or so the saying goes, and a big overhead press is definitely worth having.
This links to another reason I love the lift. So few people attempt to do it, that being able to pull it off, with good form and heavy weight, sets you apart from most in the gym.
A big overhead press is a status symbol. It tells other gymbros “I have studied and toiled and sweated and earned the right to put my bodyweight over my head without being crushed”. The continued irritation and crushingly slow pace of progress that this lift offers should be considered a badge of honor, it shows you’ve put in the hard yards to making your overhead press as strong as it could possibly be. Not many people can truthfully say that.
Below are some of the best tips collected over the years in my quest to press. Almost everyone will run in to a plateau sooner or later with this lift. Hopefully with this guide you’ll be able to bust through it when it appears.

1) Press more often
Being honest, how often do you press? Once a week? Dumbbell or barbell? Standing or seated? One of the absolute best things about this lift is the amount of variation. This means that there are many angles of attack for you to utilize. Increased frequency and volume doesn’t just mean doing the same thing three times a week.
For example, you could do standing barbell strict press for heavy triples on one day, push press for sets of 5 on another and then seated Arnold press in the 10-12 rep range on a third. All these movements will have benefit and carryover to increasing your strict press 1RM, if programmed correctly.
If you listen to the feedback from your shoulders, and are smart with your assistance work and rep schemes then you can train like this for 6-10 weeks without having any issues with overtraining.
With so many ways to press overhead, the real gold lies in working out your areas of deficiency and then thinking about how to implement the variations of this lift to help achieve your goal.
2) Work partial reps
Following on from increasing frequency, one really under-employed training modality to tackle a plateau in any lift is partial reps.
Partial reps are exactly what they sound like. Instead of doing the full range of motion; for example in the overhead press this would be from the shoulders to the lockout above the head, you pick a small section of this movement range and focus on that.
One issue that lots of people have with their overhead press is the lockout, they can get the bar up but once it passes the eyes there is a lack of triceps strength and structural stability in the shoulders to support the bar.
To attack this with partials, you should set the pins in a power rack to about eye level, load the bar up with a challenging weight and then press from the pins to lockout. Be sensible with the reps (2-3 reps per set is probably ideal, certainly no need to go over 6) and with consistency and determination you will smash through your previous 1 rep max.
3) Wear a belt and squeeze your backside
Many lifters love belts, often they love them too much and they become entirely dependent on them (do you really need to wear your belt for a set of curls?) whereas some lifters are sworn natty to the extent that they consider wearing a belt or straps as cheating.
Personally, I am pro-belt, but within limitations. You shouldn’t wear it for every set and rep, and you certainly shouldn’t wear it for anything other than big compound lifts. Don’t be the guy who waddles around the gym in his belt for 2 hours.
When it comes to pressing, I really like the support a stiff belt provides. With proper bracing of the core and an expanded belly filled with air (look up the Valsalva technique) that big overhead press has a stable platform from which to launch. Add in a good quality belt to the mix and you will find that you have a rock-solid midsection, and the lift should feel much more grounded and secure.
But breathing and tensing at the right time are absolutely crucial. Next time you do an overhead press, think about the following process.
Unrack the bar, then big breath to fill the belly with air, then lean back ever so slightly and squeeze the lats to get the bar moving. A fraction of a second after the bar moves, squeeze your backside for all its worth. This will force all your posterior chain muscles to follow suit and should help catapult that bar up to the point where your triceps take over.
You wouldn’t build a house on sand, and you won’t build a big press on a weak midsection. So get that belt on and clench your buns like your life depends on it!
4) Elbows
Too often when I see people do a barbell press, the bar path looks like someone has attached a GPS tracker to a bumble bee. The shortest distance between two points is a straight line, and the easiest way to press a barbell is up, not out!
Imagine that your elbows are boosters. They give the rocket the initial shove and force it in the right direction. If your elbow placement is off, then everything else in the lift is going to be askew also.
People think that the elbows should be directly below the bar in a straight line, but this isn’t true. They should be poking out in front of the bar slightly, and very slightly rotated internally.
This allows for tension in the elbow, forearm and shoulders which gives you the greatest push-off position. Once the bar gets to about eye level, the triceps take over so the elbows have done their job, but remember that the final position of the press is both elbows locked and roughly in line with your ears. In Crossfit they call this “the window”.
A common error to make is to have the finishing position of the press out 2 or 3 inches in front of the head. Not only is this unstable but it might also be dangerous. If you’ve got a big weight hoisted, then finishing in the correct position will mean that the load will be shared equally by the wrists, shoulders and the elbows. However, if you are finishing in front of the shoulder joint this will mean that the weight is unsupported and you’re much more likely to drop it, and probably more likely to get injured as well.
5) Work on mobility
So how do we reach this perfect finishing position? Well, you need to be mobile. I suspect that the reason lots of people finish their press in such an awkward position is because they lack the mobility to be able to get their arms up in line with their ears.
Add weight, and it becomes even less likely. How do you know if you have an overhead mobility issue? Use these steps to identify.
Firstly, stand tall and take a deep breath. As you exhale lift your arms above your head. If you need to arch your lower back – you have a mobility issue.
If you pass that test, reset, try again and take notice of your head position. If you need to tilt your head forward slightly to get your arms overhead then again you have a mobility issue.
If you fail either of these tests, then don’t worry about pressing anything heavy for the moment. Focus instead on shoulder and thoracic spine mobility. That’s not to say don’t press at all – the landmine press is ideal for a situation like this. It allows you to load the shoulders and go through the range of motion without having to reach full extension with straight arms.
Conclusion
Overhead press is great fun and will give you boulders where once you had shoulders. But don’t be put off, like so many people, by the difficulty of doing it well. It really isn’t as intimidating as it looks, and when you can press your own bodyweight overhead without trying you will have accomplished greatness.
If you run into any issues, use the guide above to diagnose and then smash your plateau with extreme prejudice. Happy pressing!
Don’t hesitate to email us at [email protected] for personalized coaching and a client questionnaire if you’d like DEDICATED tailor-made personal training on strength training, building muscle, losing fat, developing athleticism, and more — all to your liking, lifestyle, habits, and taste!
Otherwise, don’t forget to claim your FREE eBook detailing how to lose 20lb of fat while building muscle in 12 weeks! You can claim it here.
Alternatively, you can pick up a FREE eBook on fundamental strength principles offering an introductory workout program.

